At long last, this is the final entry in the ‘streamlining score sharing’ series. With all of the data now at our disposal, all that’s left is to render it out to an image and submit it to Discord. In this post, we’ll turn our hook library into a server, create a matching client, and finally, share scores with a single button press.
Before we get started, let’s talk about that server part that I haven’t mentioned until now. Rather than do all the image rendering and API handling inside our existing library, I thought it would be a better idea to split it up into two parts instead: a server component that simply broadcasts the score data over the network, and a client component that handles all the rest.
The primary benefit with this approach is that the hook library remains simple and reliable. There aren’t many things that can go wrong with our current code, but when we start adding configuration, image rendering and WebSockets into the mix, suddenly there’s a lot that could go wrong. This is also true for the client, but an issue there isn’t going to bring the game down with it.
Being networked also means we could run the client on a separate machine. This could be useful for more intensive tasks that would impact gameplay if performed on a single machine – for example, if recording on a second PC, the client could be used to automatically start and stop the encoder between each chart, allowing for easier uploading of highlights after a session.
Admittedly, this client-server approach isn’t quite as convenient as having everything contained in a single library, but it’s easy enough to start the client alongside the game with a batch script or run it as a background service.
Okay, with that out of the way, let’s continue from last time! I’ve published the code to GitHub if you want to see it in full.
First things first, getting the server up and running on a port. Rather than subjecting you, but mostly me, to plain Winsock, I’ve decided to implement the server using ZeroMQ and cppzmq instead. Here’s how to bind the server with ZeroMQ:
zmq::context_t context;
zmq::socket_t server;

server = zmq::socket_t(context, zmq::socket_type::pub);
server.bind("tcp://0.0.0.0:5730");
Pretty easy, huh? Now we just need to wrap up our score data and send it across.
nlohmann::json message;

message["player"]["name"] = player_name;

message["music"]["id"] = state->music->entry_id;
message["music"]["title"] = state->music->title;
message["music"]["artist"] = state->music->artist;

message["chart"]["rating"] = chart.rating;
message["chart"]["play_style"] = state->play_style;
message["chart"]["difficulty"] = state->p1_active ? state->p1_difficulty: state->p2_difficulty;

message["judgement"]["pgreat"] = judgement.pgreat;
message["judgement"]["great"] = judgement.great;
message["judgement"]["good"] = judgement.good;
message["judgement"]["bad"] = judgement.bad;
message["judgement"]["poor"] = judgement.poor;

message["judgement"]["combo_break"] = judgement.combo_break;

message["judgement"]["fast"] = judgement.fast;
message["judgement"]["slow"] = judgement.slow;

message["clear"]["best"] = CLEAR_TYPE[frame_data.best_clear_type];
message["clear"]["current"] = CLEAR_TYPE[frame_data.current_clear_type];

message["dj_level"]["best"] = DJ_LEVEL[frame_data.best_dj_level];
message["dj_level"]["current"] = DJ_LEVEL[frame_data.current_dj_level];

message["ex_score"]["best"] = frame_data.best_ex_score;
message["ex_score"]["current"] = frame_data.current_ex_score;

message["miss_count"]["best"] = frame_data.best_miss_count;
message["miss_count"]["current"] = frame_data.current_miss_count;

message["pacemaker"]["name"] = pacemaker_data.name;
message["pacemaker"]["score"] = pacemaker_data.score;
message["pacemaker"]["type"] = PACEMAKER_TYPE[pacemaker_data.type];

const auto str = message.dump();

server.send(zmq::message_t { str.c_str(), str.size() }, zmq::send_flags::none);
That should work… in theory, but we’ll need to build a test client to be sure. I’ll be writing it in Node.js, but this part is pretty flexible. Any language with ZeroMQ bindings and the ability to decode JSON will work just fine.
const zmq = require('zeromq/v5-compat');
const client = zmq.socket('sub');

client.on('message', data => {
	const message = JSON.parse(data);

	console.dir(message);
});

client.subscribe(''); // subscribe to all events
client.connect('tcp://127.0.0.1:5730');
Here’s the basic client code. It creates a subscriber socket, connects to the server and prints out incoming messages.
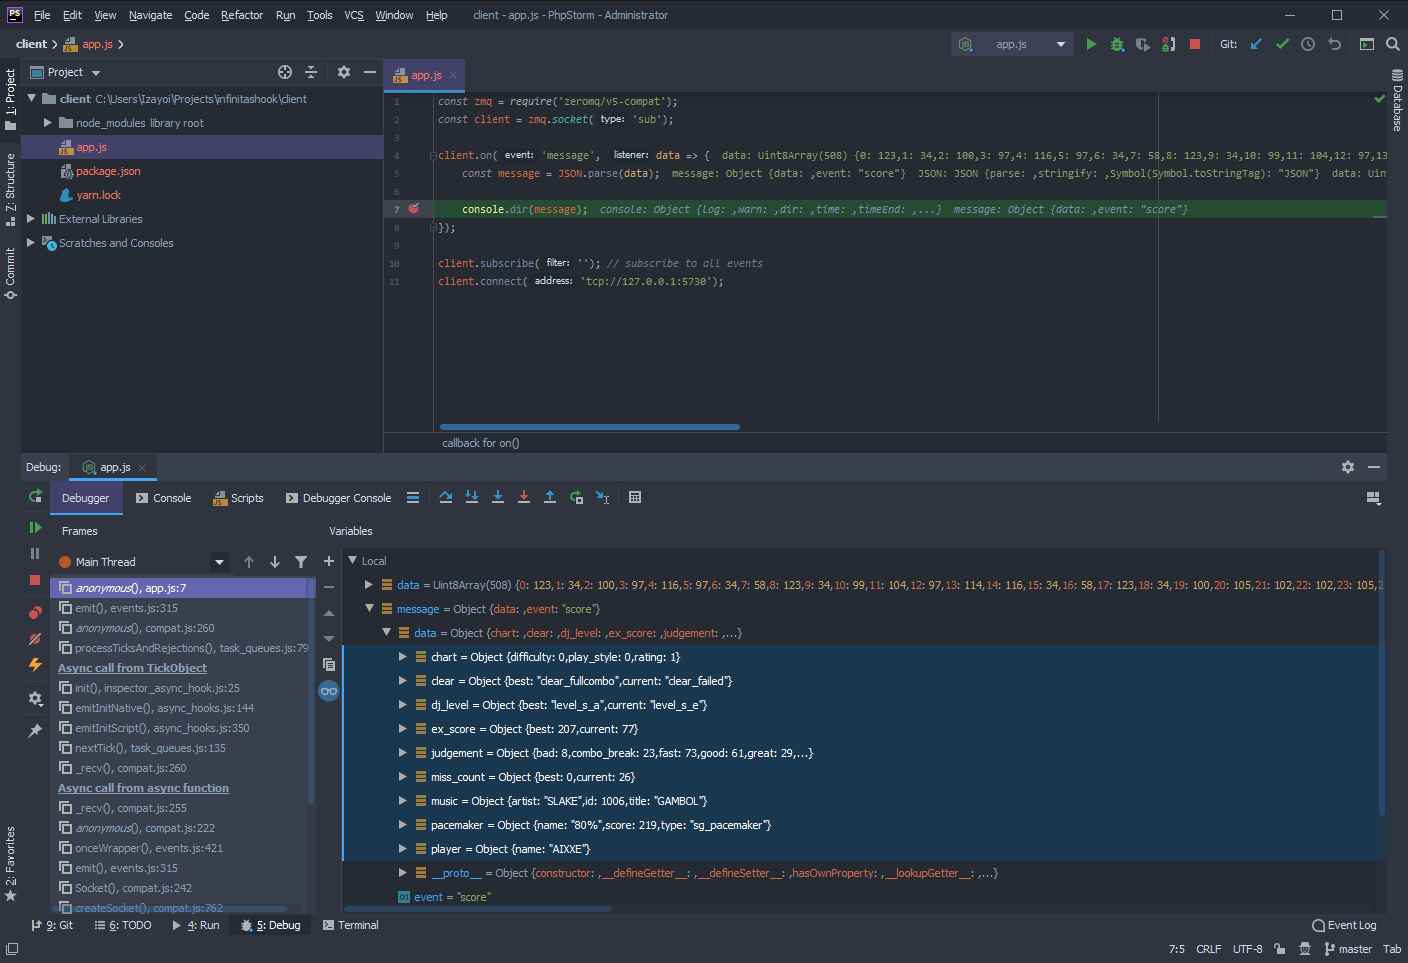 Please don’t look too closely at that score.
This worked great… until I played a song with Japanese text in the title and the game immediately crashed! After some debugging it turned out to be a character encoding issue. The game uses SHIFT-JIS internally and the JSON library didn’t like that. I ended up working around it by converting the title and artist strings into byte arrays that the client can piece together later.
With that, we’re almost finished with the server. There’s just one thing missing now – an input message that we can use as the trigger to submit the score. That said, the server code is already starting to get a bit… messy.
One clean up led to another, and before I knew it I had refactored the whole thing. The structure is quite different but it still hooks a function and starts a server, so not much has really changed. The notable new additions are some logging macros, GCC support for the assembly hook function, and of course, the input polling code at src/input_poll.cc.
std::vector<key_t> keys = {
	{"0", VK_NUMPAD0},
	{"1", VK_NUMPAD1},
	{"2", VK_NUMPAD2},
	{"3", VK_NUMPAD3},
	{"4", VK_NUMPAD4},
	{"5", VK_NUMPAD5},
	{"6", VK_NUMPAD6},
	{"7", VK_NUMPAD7},
	{"8", VK_NUMPAD8},
	{"9", VK_NUMPAD9},
};
These are the keys that get checked each time the poll function is called. Anything on this list of virtual key codes should work, so feel free to change it if you don’t have a numpad or just want to use other keys.
Now it’s time to switch over to the client. We’re already able to receive score data, so now we just need to turn that into an image, but how? Turns out the answer is quite simple: just stack a bunch of images on top of more images.
 Gradients… so many gradients…
Here’s my recreation of the e-amusement mobile scorecard. I made it in Photoshop with a bunch of shapes and gradients. You can download the .psd file here if you want to take a closer look. The custom fonts are listed in the README file here.
After a few days of tweaking here and there, I was finally satisfied with how it looked. I exported all the layers out into separate images and prototyped by stacking the various assets on top of each other in Chrome using the built-in Dev Tools.
It worked so well that I got a bit carried away. I continued to expand on the HTML-based prototype, creating the elements dynamically with JavaScript, then converting those elements into more maintainable components. By this point I had spent a lot of time converting everything to Vue.js, comparing against reference images and working out all the various edge cases.
Rather than discard a lot of that work and switch to using a graphics library like GD or ImageMagick, I looked around to see if there were any browser-based solutions that might do the trick, eventually leading me to Puppeteer – a Node.js library that facilitates controlling a headless instance of supported web browsers.
Certainly not the most lightweight solution, sure, but integrating it with the client was a breeze. Here’s how it’s done:
browser = await puppeteer.launch({ headless: false });
page = await browser.newPage();

await page.goto('file:' + path.resolve('external', 'iidx-scorecard', 'template.html'));
await page.setViewport({ width: 400, height: 600 });

client.subscribe('');
client.connect('tcp://127.0.0.1:5730');
Here we launch a browser instance and create a new page. Disabling headless in the puppeteer.launch options means the browser will launch in a
window and we’ll be able to see what it’s doing directly. Very useful for debugging.
We then navigate to where the iidx-scorecard template file is stored on disk, and set the viewport to match the dimensions of the final scorecard image. The rest is the same as before – connect to the infinitashook server and listen for messages.
let browser, page = null;

async function screenshot(data) {
    await page.reload({ waitUntil: 'domcontentloaded' });
    await page.evaluate(data => {
        window.score = data;
        new Vue({el: '#scorecard'});
    }, data);

    // capture a screenshot and return as a buffer
    return await page.screenshot();
}
Next, we create a screenshot function which accepts a single argument containing the score data object. This function reloads the page, waits until it is fully loaded, then evaluates JavaScript from within the browser page. In this case, we copy the score data into the globally accessible variable score, then invoke Vue.js which will read from it and render the components.
client.on('message', async (data) => {
    let message = JSON.parse(data);

    if (message.event === 'score') {
        // convert music title and artist from array of shift-jis encoded bytes into utf-8 strings
        message.data.music.title = jconv.decode(Buffer.from(message.data.music.title), 'SJIS');
        message.data.music.artist = jconv.decode(Buffer.from(message.data.music.artist), 'SJIS');

        const image = await screenshot(message.data);

        // write screenshot to file
        await fs.writeFile(`./cards/${ Date.now() }.png`, image);
    }
});
Lastly, we invoke the screenshot function in the message handler.
This generates an image for every score, and saves it in the cards directory. I suppose this might be useful for archival purposes, but I’m personally only interested in keeping the highlights. Let’s extend our event listener to handle the input message.
if (message.event === 'score') {
    // convert music title and artist from array of shift-jis encoded bytes into utf-8 strings
    message.data.music.title = jconv.decode(Buffer.from(message.data.music.title), 'SJIS');
    message.data.music.artist = jconv.decode(Buffer.from(message.data.music.artist), 'SJIS');

    // save score but don't submit it yet
    score = message.data;
}

if (message.event === 'input') {
    // only post if the '0' key was pressed
    if (message.data.keys.indexOf('0') === -1)
        return false;

    // make sure there's a valid score ready to be posted
    if (score === null)
        return false;

    // copy the score, then clear it so it can't be posted twice
    const data = {...score}; score = null;

    // generate an image from the score
    const image = await screenshot(data);

    // save image locally
    await fs.writeFile(`./cards/${ Date.now() }.png`, image);
}
With this change, scorecard images will only be generated when the zero key is pressed. But we can go one step further…
const discordjs = require('discord.js');
const hook = new discordjs.WebhookClient('webhook_id_goes_here', 'webhook_token_goes_here');
// save image locally... then post to discord!
await fs.writeFile(`./cards/${ Date.now() }.png`, image);
await hook.send(new discordjs.MessageAttachment(image, 'score.png'));
In addition to the local copy in the cards directory, it will now also post to Discord with just a few extra lines. This is achieved with the Webhook client in discord.js. You can create one of these in any server, assuming you have the relevant permissions.
And that’s… everything! This part turned out a little shorter than I expected, but I suppose there wasn’t that much left to do. I’ve skimmed over some details regarding the scorecard implementation – it really was just stacking images on top of images with a bit of JavaScript added in-between. I recommend checking out the components directory if you’d like to see how it all works.
As for the future, I imagine I’ll be back to one-off posts for the foreseeable future. I’m glad to have chronicled an entire project from start to finish like this, but it’s been difficult to maintain the motivation, hence why it’s taken so long to finish.
Until next time. Thanks for reading.