After moving all my computer stuff into a larger room I noticed that the short HDMI cable I had previously been using to connect the gaming and streaming machines together would no longer be a viable solution. Solving this turned out to be quite an ordeal, but the interesting kind that’s worth writing about.
First, a bit of context regarding my rather uncommon setup. I currently have three computers in my room: my main desktop, a server and a low-end gaming PC used exclusively for rhythm game simulators. Back when space was at a premium, all three were positioned next to each other with the GPU output of the gaming PC going directly to a capture card in the desktop.
It wasn’t perfect, but it worked well enough. Now fast forward to the starting point of this project, the server and gaming PC are still positioned next to each other but my desktop has moved to the other side of the room.
If you’re wondering why I didn’t just buy a long HDMI cable and call it a day.. sure, that would’ve worked, but where’s the fun in that? In all seriousness, though, shifting the streaming and recording responsibilities from my desktop to the server was something that had been on my to-do list for a while. There was just one problem - my server ran Linux.
Unfortunately, as luck would have it, neither of the internal HDMI capture cards in my possession had drivers for Linux. Was that the end? Of course not. I had heard of people passing through their GPUs to virtual machines so why not pass through the capture card to a Windows virtual machine? I had thought about trying this out a few years back, but concerns regarding performance, hardware compatibility and the sheer length of the wiki article seemed a bit intimidating at the time.
In retrospect, it really wasn’t all that complicated. After an hour or two of reading the ArchWiki and a couple of other sources I had a rough idea of how all the different components worked and what I needed to do.
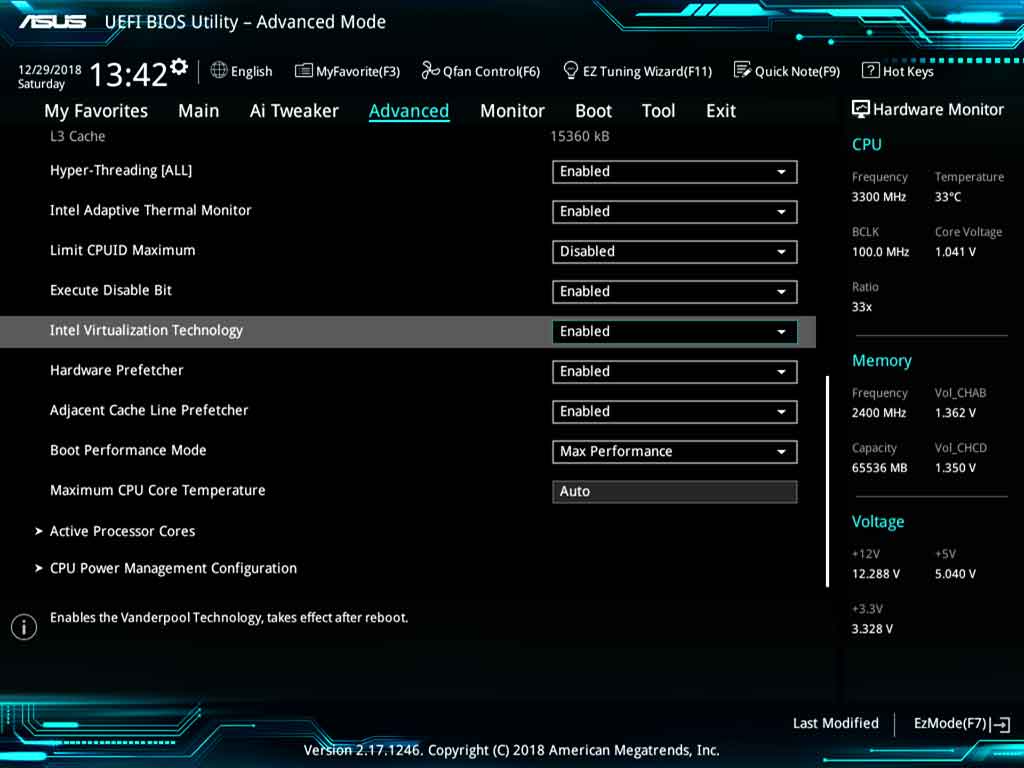
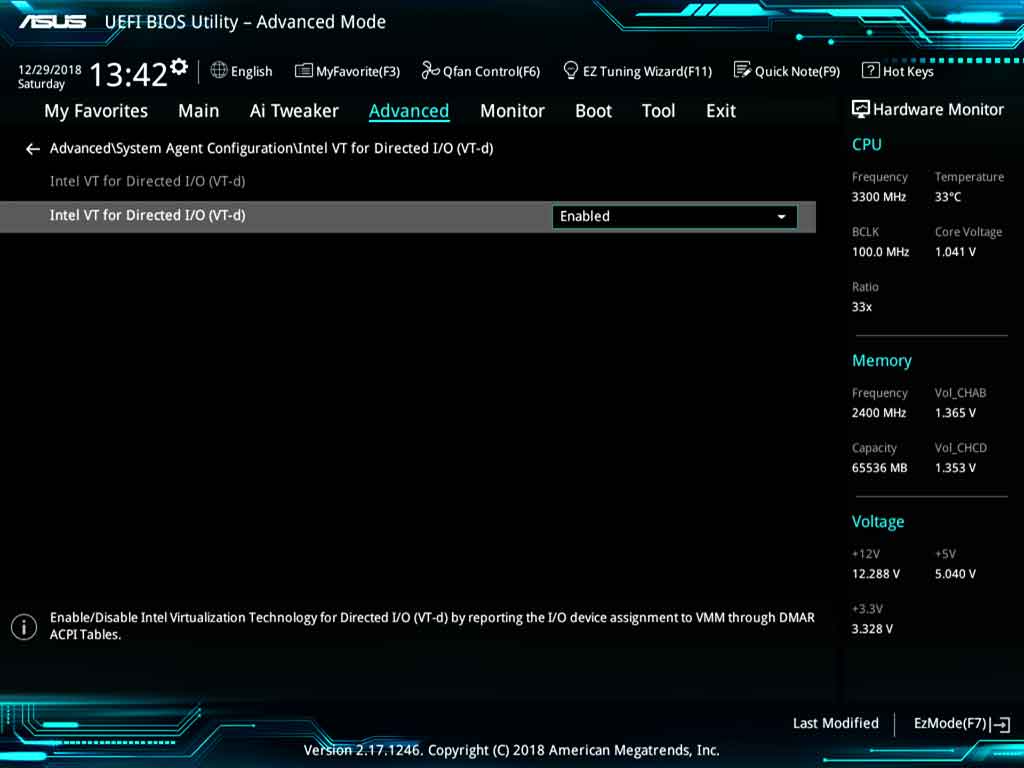
First step was to see if I fulfilled all the prerequisites. My CPU supported hardware virtualization and IOMMU so it was just a matter of making sure they were both enabled in the BIOS settings. I wasn’t so sure about the motherboard but I had seen others report success with various other X99 chipset boards so my hopes were high.
In addition to the BIOS settings, IOMMU also had to be enabled via the kernel command line. I also added video=efifb:off since I would be passing through the boot GPU and I wanted to sidestep any potential issues further down the line.
# /boot/loader/entries/arch.conf (systemd-boot)
options root=PARTUUID=e42c23e6-2992-7240-99f1-6de0d4e5ab31 rw intel_iommu=on iommu=pt video=efifb:off
Using a shell script, I could see that the GPU and its audio controller resided in their own IOMMU group. Considering the abundance of documentation out there regarding GPU passthrough, it seemed like the most logical place to start.
IOMMU Group 26 01:00.0 VGA compatible controller [0300]: NVIDIA Corporation GK208B [GeForce GT 710] [10de:128b] (rev a1)
IOMMU Group 26 01:00.1 Audio device [0403]: NVIDIA Corporation GK208 HDMI/DP Audio Controller [10de:0e0f] (rev a1)
The placeholder drivers need to bind early during system boot so it was necessary to add the vfio_pci module along with its dependencies to mkinitcpio.conf and regenerate the initial ramdisk image with mkinitcpio -p linux.
In order to pass the device IDs to the vfio_pci kernel module I created a vfio.conf file in /etc/modprobe.d.
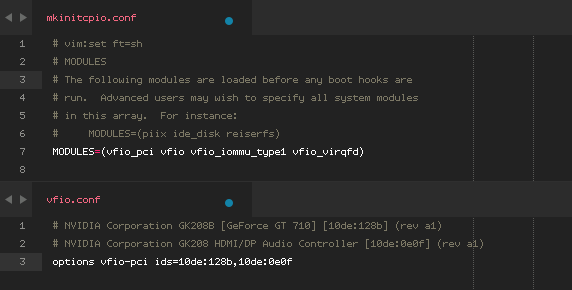 Editing /etc/mkinitcpio.conf and /etc/modprobe.d/vfio.conf.
From this point on, the graphics card would no longer be available to the host. This was a good time to ensure the network and sshd were definitely going to be up and running after the next system reboot.
$ dmesg | grep -i vfio
[    9.766827] VFIO - User Level meta-driver version: 0.3
[    9.774848] vfio-pci 0000:01:00.0: vgaarb: changed VGA decodes: olddecodes=io+mem,decodes=io+mem:owns=io+mem
[    9.790792] vfio_pci: add [10de:128b[ffff:ffff]] class 0x000000/00000000
[    9.807471] vfio_pci: add [10de:0e0f[ffff:ffff]] class 0x000000/00000000
$ lspci -nnkd 10de:128b
01:00.0 VGA compatible controller [0300]: NVIDIA Corporation GK208B [GeForce GT 710] [10de:128b] (rev a1)
        Subsystem: ASUSTeK Computer Inc. GK208B [GeForce GT 710] [1043:8576]
        Kernel driver in use: vfio-pci
        Kernel modules: nouveau
$ lspci -nnkd 10de:0e0f
01:00.1 Audio device [0403]: NVIDIA Corporation GK208 HDMI/DP Audio Controller [10de:0e0f] (rev a1)
        Subsystem: ASUSTeK Computer Inc. GK208 HDMI/DP Audio Controller [1043:8576]
        Kernel driver in use: vfio-pci
        Kernel modules: snd_hda_intel
Looking good. With all the hardware stuff out of the way it was time to install and configure libvirtd.
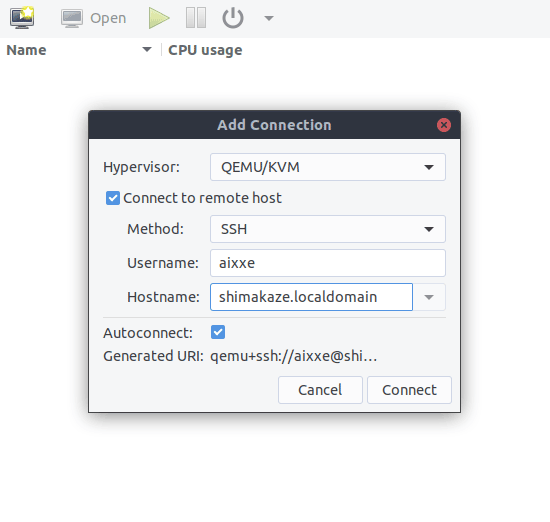
I made a couple of deviations from the guide here, opting for qemu-headless instead of qemu since I had no intention of doing any management on the host. This meant I could also skip installing virt-manager and install it on my desktop instead.
It was also necessary to install openbsd-netcat in order for connections to libvirtd over SSH to work.
# pacman -S libvirt qemu-headless ovmf openbsd-netcat
Before starting libvirtd, I added a Polkit rule to bypass password prompts for users in the wheel group.
# systemctl enable libvirtd.service --now
 Had to reboot the host again before polkit would allow me to connect. A known issue.
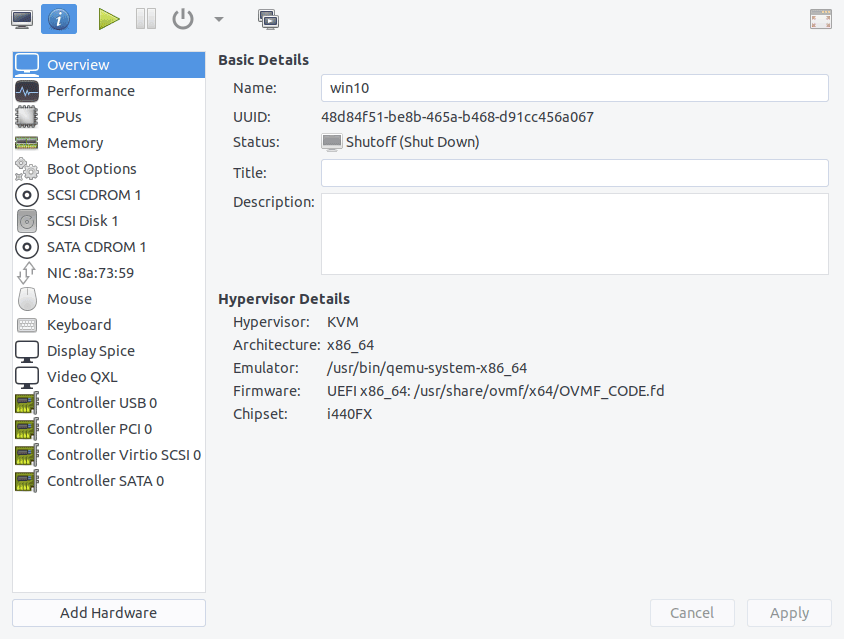
Creating a Windows 10 virtual machine only took a few minutes. I had never used virt-manager or libvirtd before but I found it very intuitive and an absolute pleasure to work with. It’s easily my software of choice for virtualization on Linux now.
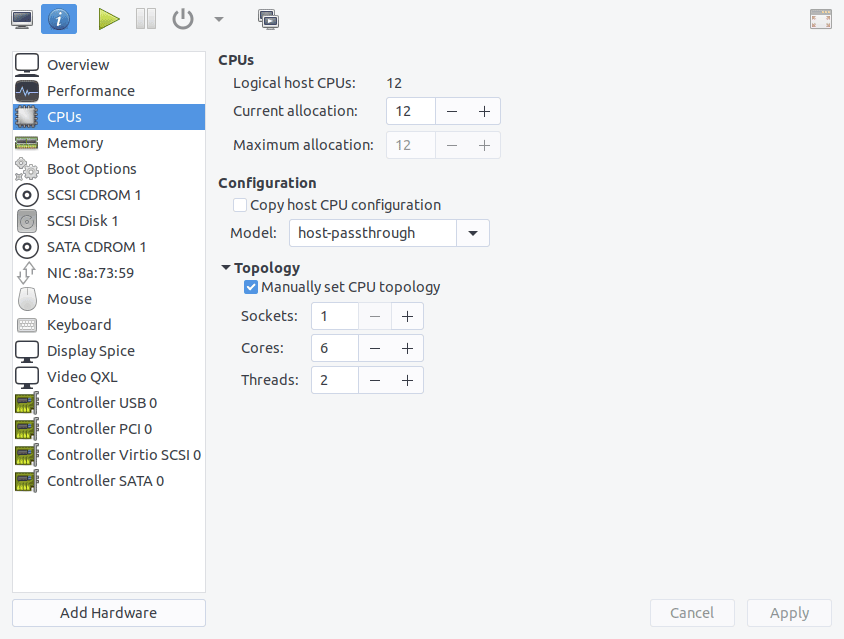
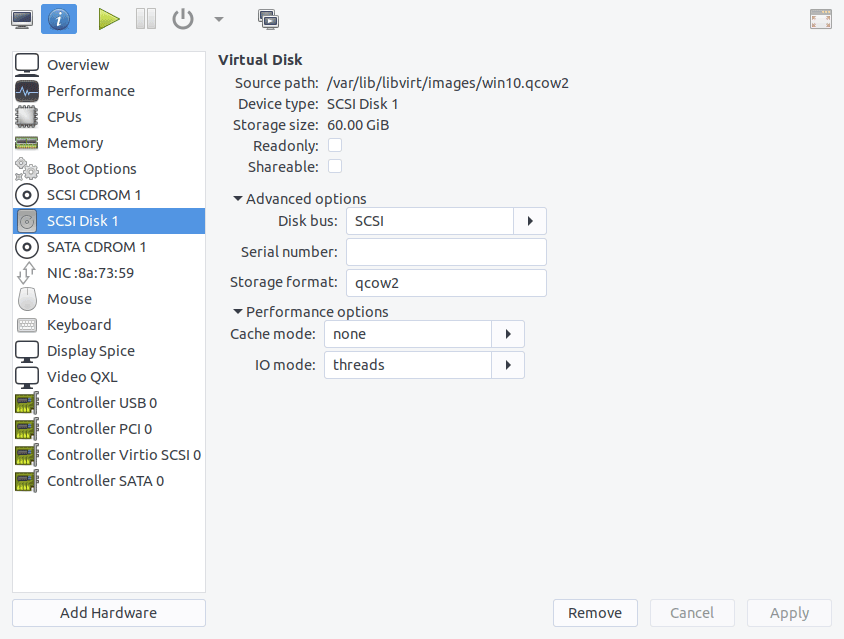
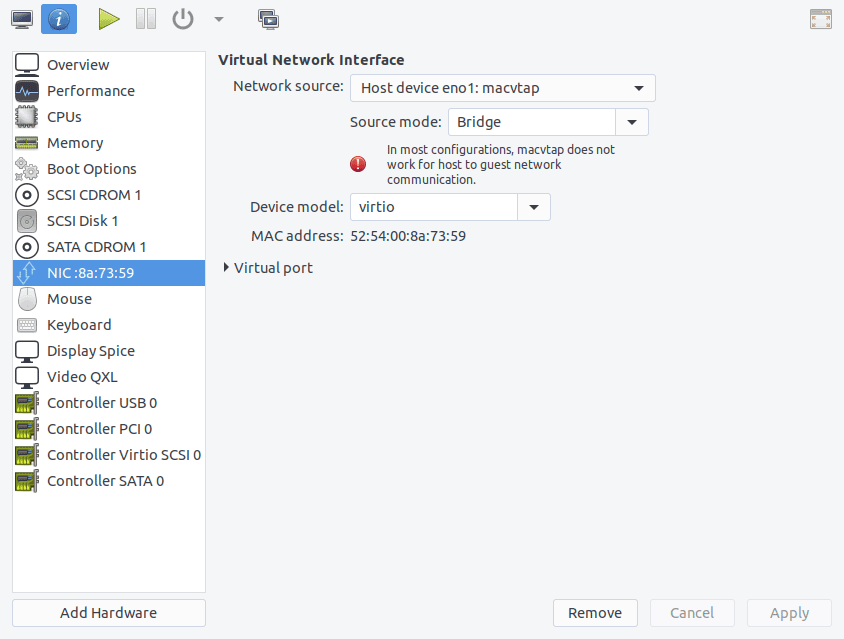
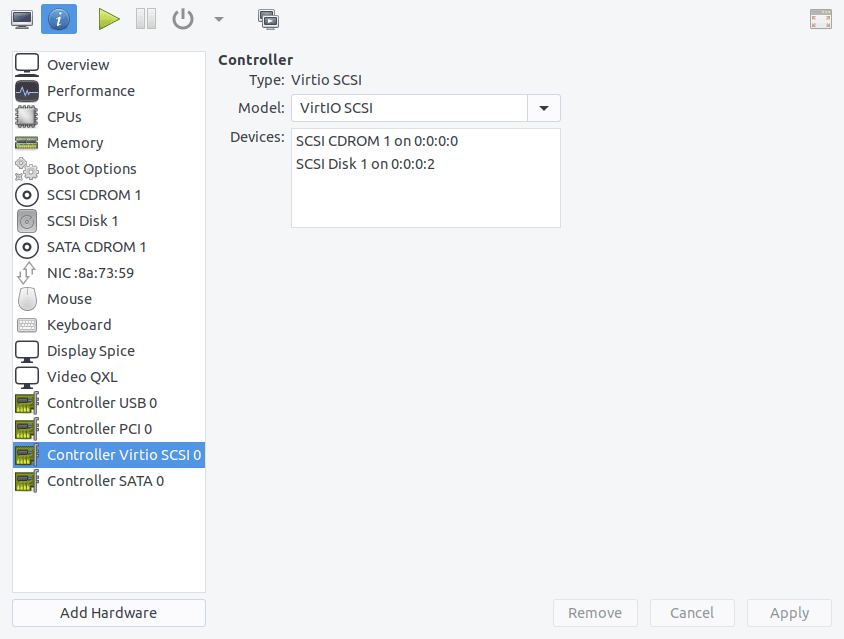
As for the configuration itself, fairly standard aside from a few components being swapped out with their VirtIO counterparts where possible for better performance. I made sure to attach the latest VirtIO driver CD using a SATA controller so that the Windows installer would be able to find it.
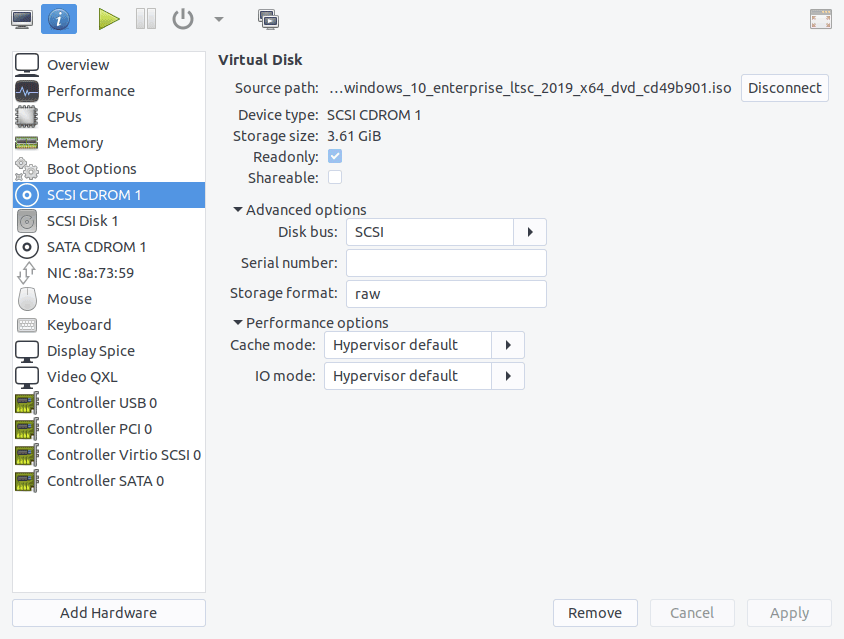
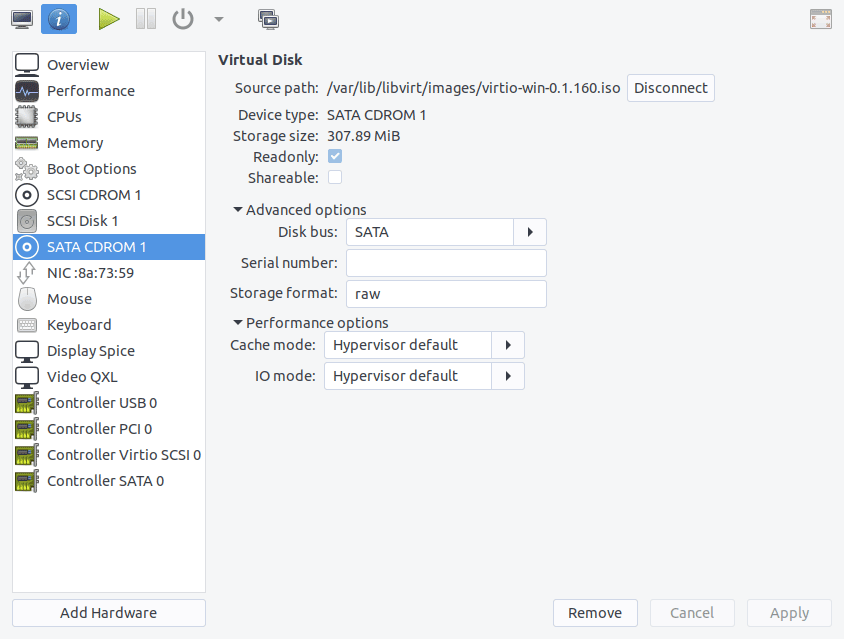
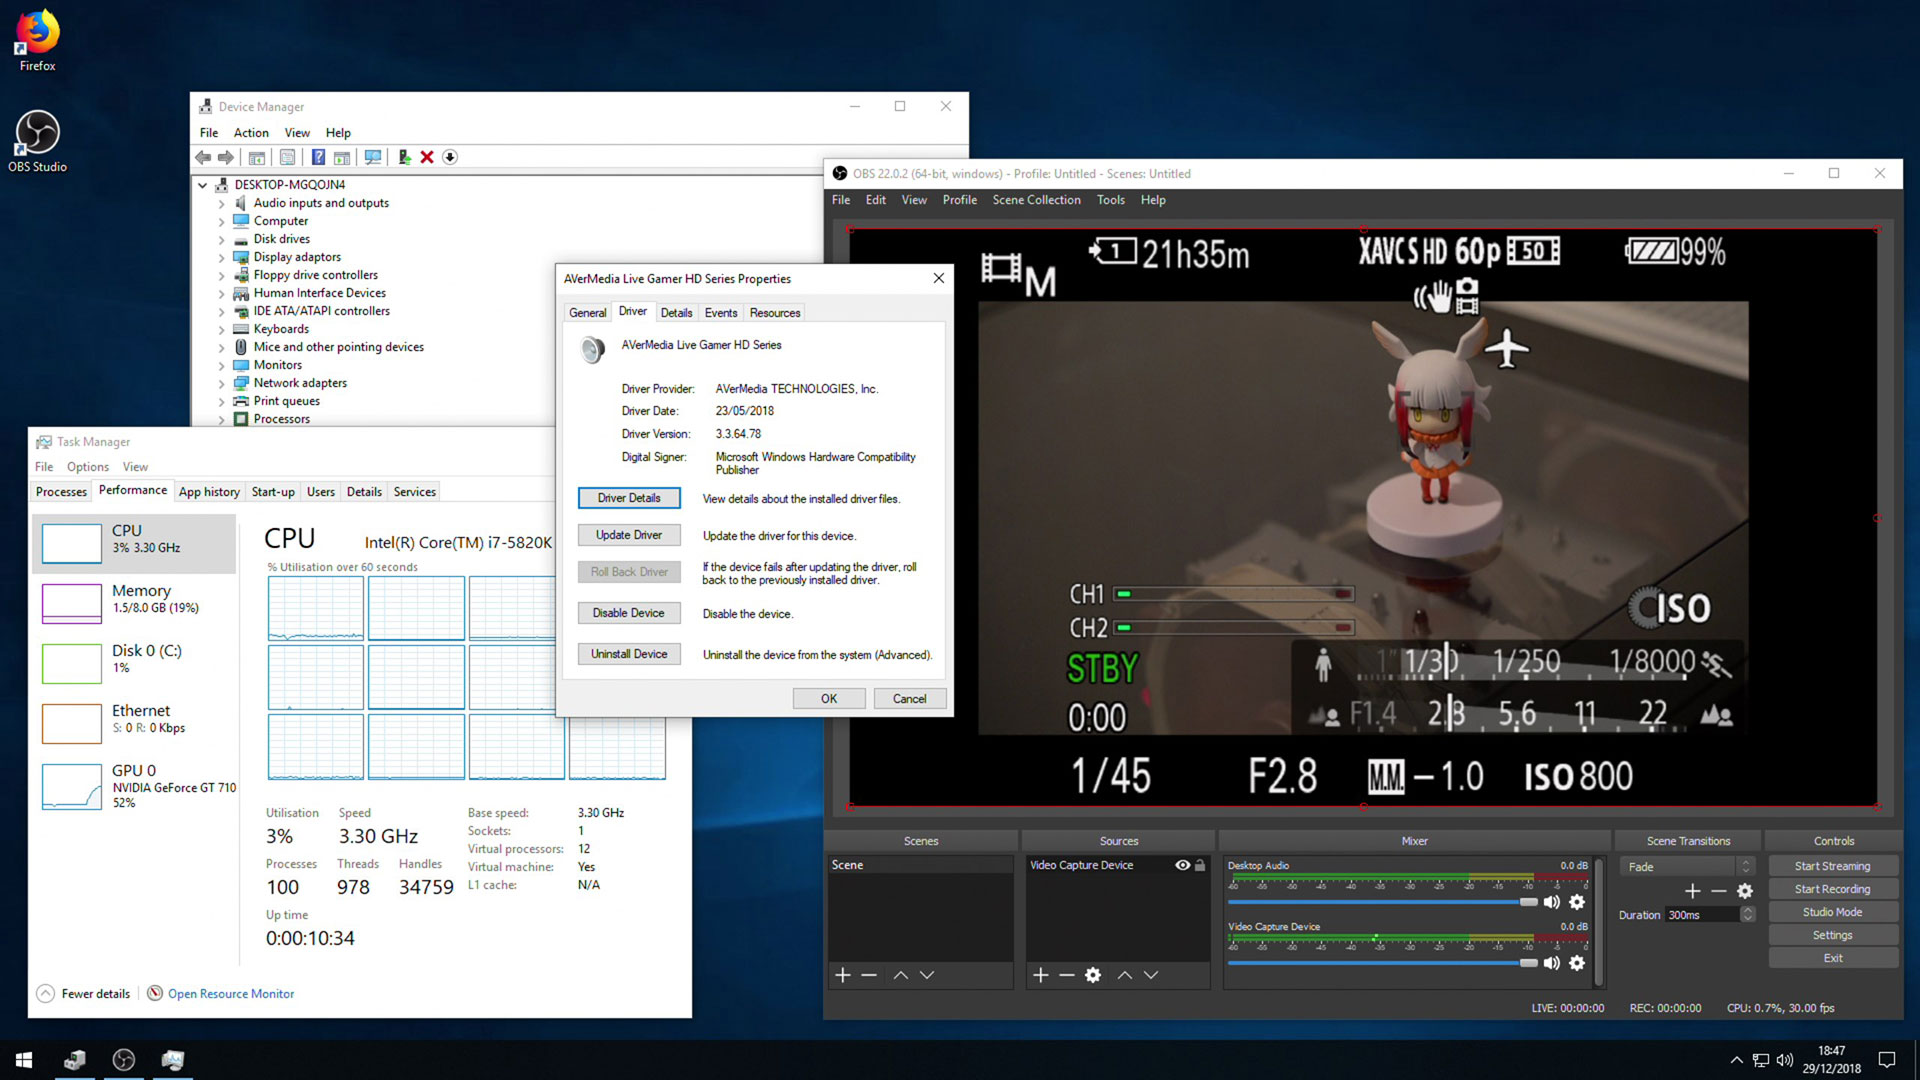
After the first-time setup I opened Device Manager and installed the remaining drivers for the VirtIO Balloon and Ethernet devices. I wouldn’t be using the CD drives again so I shut the virtual machine down and removed both of them, along with the SATA controller. With that, it was finally time to pass the graphics card through to the virtual machine.
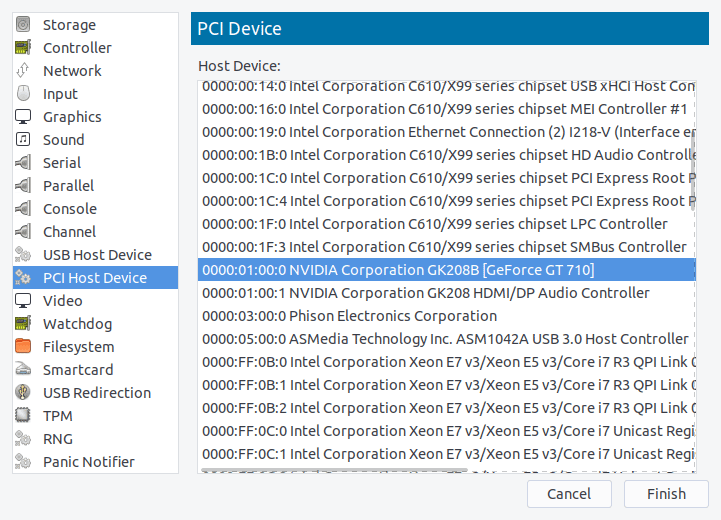 Audio controller too. Don’t think I need to add another screenshot for that.
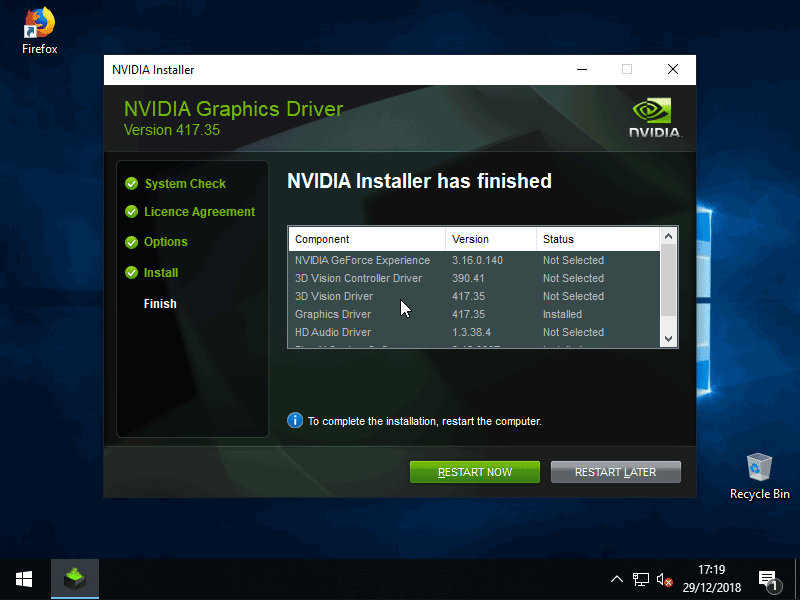
I started the virtual machine up and installed the latest NVIDIA drivers. The installation finished, yet there was still nothing but a black screen on the monitor. I checked Device Manager and, just as I thought, there it was.
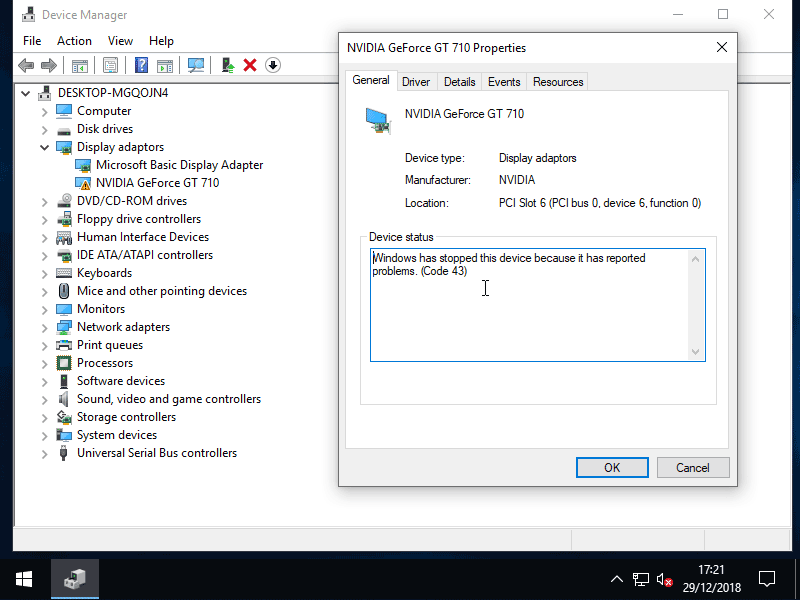
The infamous Code 43 error. Apparently it’s a result of the NVIDIA driver detecting a consumer card running inside a hypervisor. Something they’re evidently not a fan of. No need to panic, there were a few solutions online that I had yet to try.
# virsh edit win10
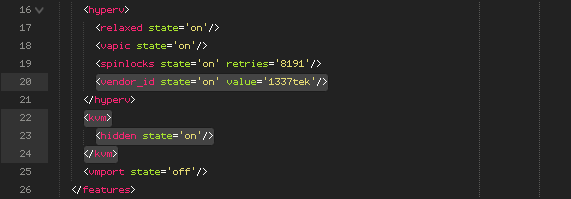 While this didn’t immediately fix the issue it turned out to be necessary in the end.
Booted up the virtual machine and.. still nothing. After a bit more reading, it seemed to be a common issue encountered when passing the boot GPU through to a virtual machine. In order to get around it I would need a clean GPU VBIOS dump.
Fortunately this wasn’t anything complex but it did require a second graphics card. I moved the passthrough GPU down to a secondary slot and installed a spare into the primary slot to act as the new boot GPU.
Following these instructions, I attempted to dump the GPU VBIOS.
# cat /sys/bus/pci/devices/0000:02:00.0/rom > ./vga_gt710.rom
cat: '/sys/bus/pci/devices/0000:02:00.0/rom': Input/output error
For some reason the error only went away after starting up and then shutting down the virtual machine. Also had to remove the PCI devices in virt-manager and add them again due to the passthrough GPU moving slots on the motherboard.
# echo "0000:02:00.0" > /sys/bus/pci/drivers/vfio-pci/unbind
# echo 1 > /sys/bus/pci/devices/0000:02:00.0/rom
# cat /sys/bus/pci/devices/0000:02:00.0/rom > /var/lib/libvirt/boot/vga_gt710.rom
# echo 0 > /sys/bus/pci/devices/0000:02:00.0/rom
# echo "0000:02:00.0" > /sys/bus/pci/drivers/vfio-pci/bind
# virsh edit win10
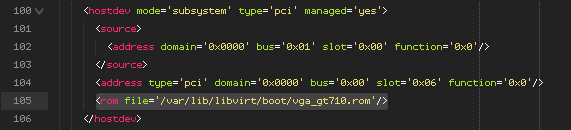
With that, the monitor sprung to life and I was greeted with the login screen.
Now that the GPU passthrough was all working it was back to the main goal, the capture card.
IOMMU Group 30 06:00.0 Unassigned class [ff00]: Device [1af2:a001]
A bit strange that it doesn’t show a real name in lspci, but a quick search online of the vendor ID confirmed it to be the capture card so it was back to /etc/modprobe.d/vfio.conf once again. Appended the new device ID, regenerated the initial ramdisk image, rebooted, added the device in virt-manager and finally, started the virtual machine up again.
I’ve been gradually refining things since then, implementing a few performance tweaks here and there. Recently installed a 4-port USB 3.0 PCI-E card since only one controller on my motherboard supported resetting. Also ended up passing through the entire onboard audio controller and a hard drive for recording file storage.
This whole thing was great fun to experiment with. It kept me busy for a few weeks but it’s all mostly complete now so it’s probably time to move on to something new. Until next time, have a Happy New Year!