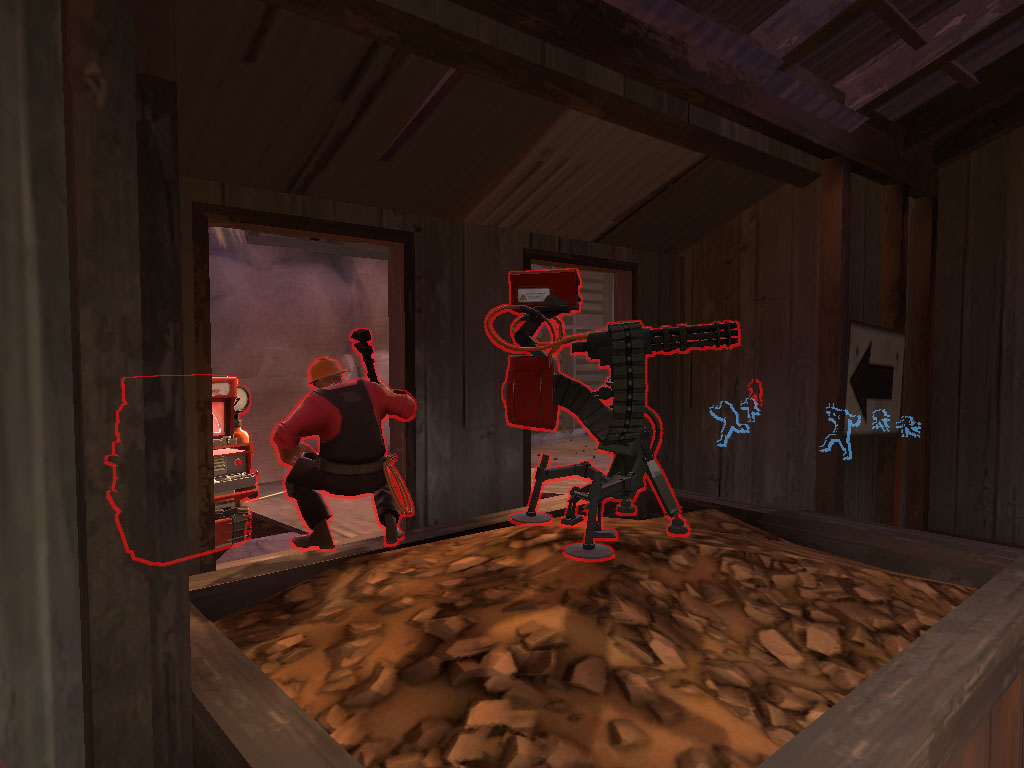
We’re going to take a look at the ever so popular glow outline effect present in various Source games. This has well and truly been done to death but with the most prominent public code being horribly written and the users of it having no idea how it works I thought I’d simplify things and post my own take on it.
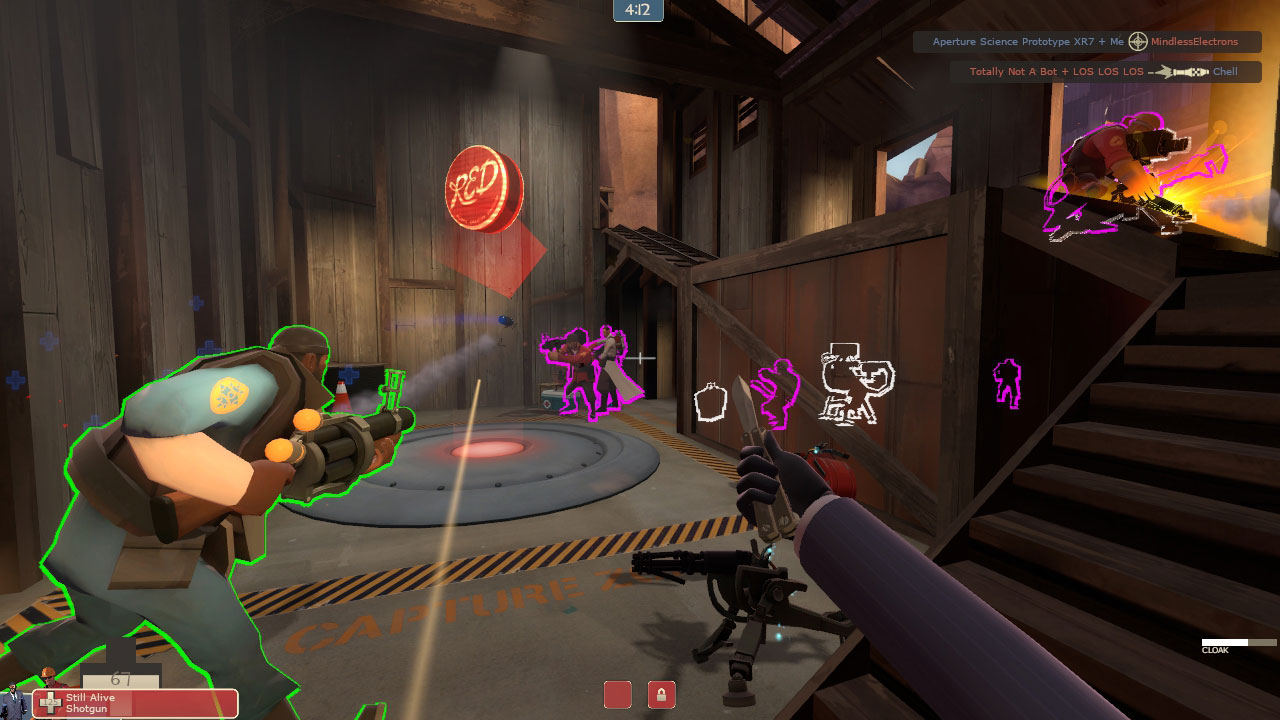
If you’re not sure what I’m referring to, it’s the outline effect you can see present in the two screenshots below. It’s applied to various entities such as players, weapons and buildings. In this post we’ll be finding the glow object manager in IDA, adding the required classes to our code and finally changing colors and making the effect appear at all times.

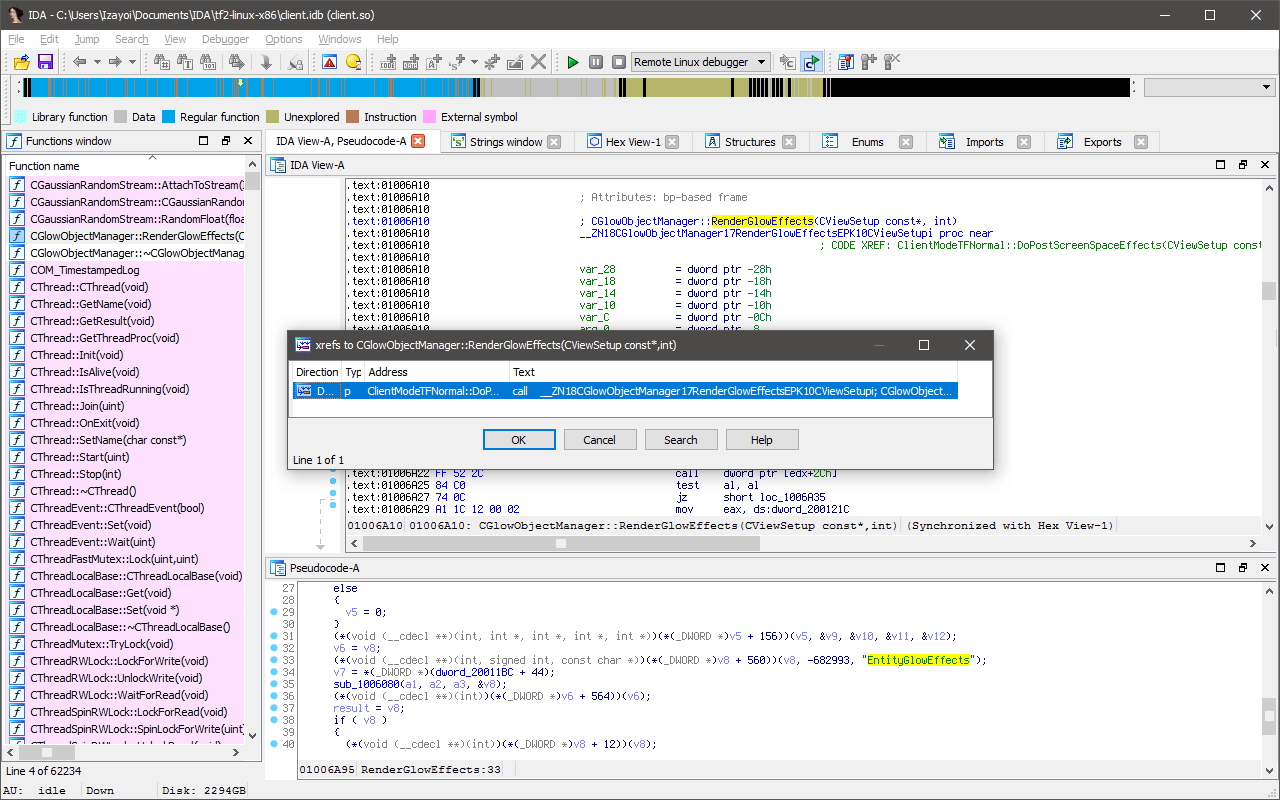
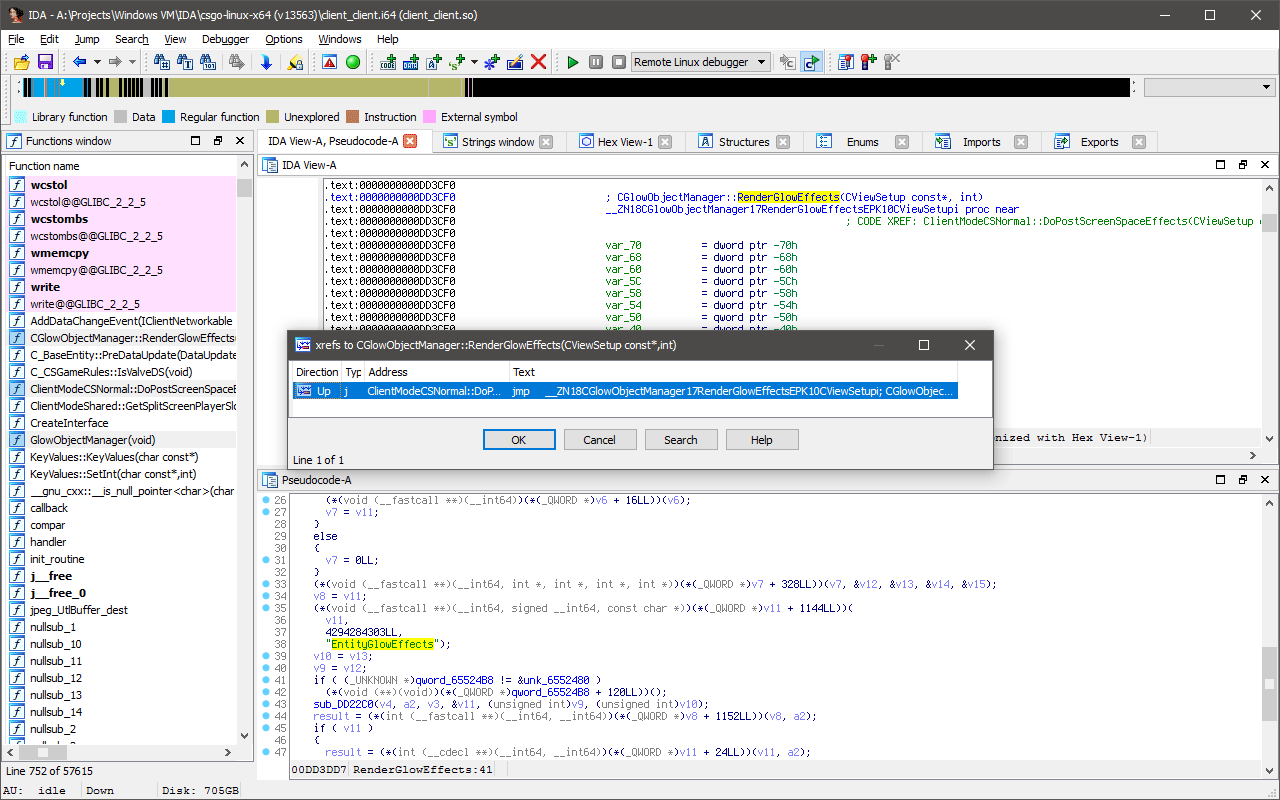
It’s worth noting that there are a lot of different ways to find the glow object manager. I decided to use this one since it’s simple and works in multiple Source games. All we need to do is look for a string reference, in this case “EntityGlowEffects” in CGlowObjectManager::RenderGlowEffects. Let’s start off with Team Fortress 2.
One string search in client.so later and we’ve found CGlowObjectManager::RenderGlowEffects. Now we can check to see if this function is called somewhere. If it is, the first argument passed to it will be the glow object manager. Sure enough, there’s a single reference to this function. Follow it and we’ve found exactly what we were looking for.
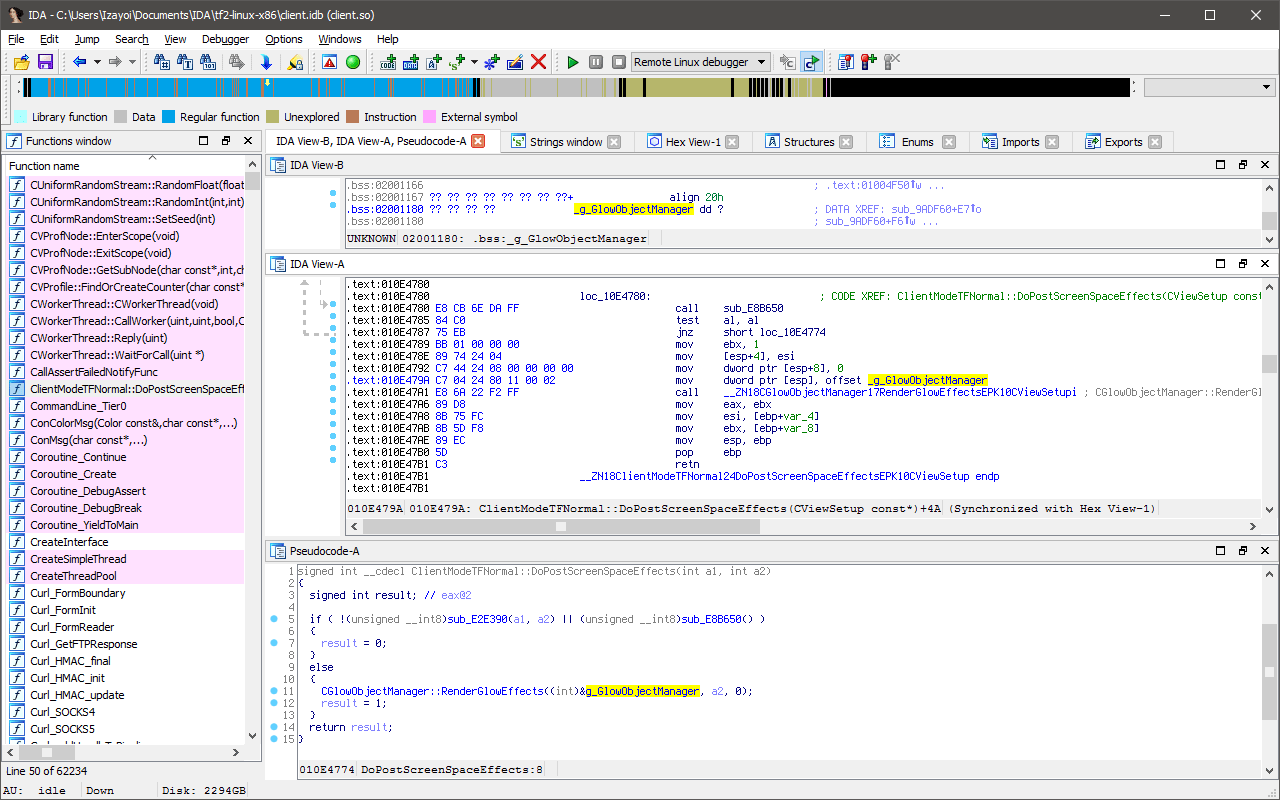
That’s it. In a few seconds we’ve found the glow object manager at 0x2001180 from client.so. Apologies if you were expecting some breakpoint magic. I had planned to include a whole section where we break on RenderGlowEffects and read the arguments off the stack but I didn’t want to over-complicate something as simple as this. Maybe next time.
For the purposes of this tutorial we can simply use the offset from the library base address.
glowobjectmanager = reinterpret_cast<CGlowObjectManager*>(client_so_addr + 0x2001180);
Next, we need to implement the necessary classes. We don’t need to concern ourselves too much with most of the CUtlMemory and CUtlVector features so minimal structures just for getting to the elements will suffice.
template <class T, class I = int> class CUtlMemory {
    public:
        T& operator[](int i) {
            return m_pMemory[i];
        };

        T* m_pMemory;
        int m_nAllocationCount;
        int m_nGrowSize;
};
template <class T, class A = CUtlMemory<T>> class CUtlVector {
    public:
        typedef A CAllocator;

        T& operator[](int i) {
            return m_Memory[i];
        };

        CAllocator m_Memory;
        int m_Size;
        T* m_pElements;
};
Next up, the actual glow object manager. This is mostly unmodified from the Source SDK with a few minor changes.
#define END_OF_FREE_LIST -1
#define ENTRY_IN_USE -2
struct GlowObjectDefinition_t {
    CBaseHandle m_hEntity;
    Vector m_vGlowColor;
    float m_flGlowAlpha;
    bool m_bRenderWhenOccluded;
    bool m_bRenderWhenUnoccluded;
    int m_nSplitScreenSlot;
    int m_nNextFreeSlot;
};
class CGlowObjectManager {
    public:
        CUtlVector<GlowObjectDefinition_t> m_GlowObjectDefinitions;
        int m_nFirstFreeSlot;
};
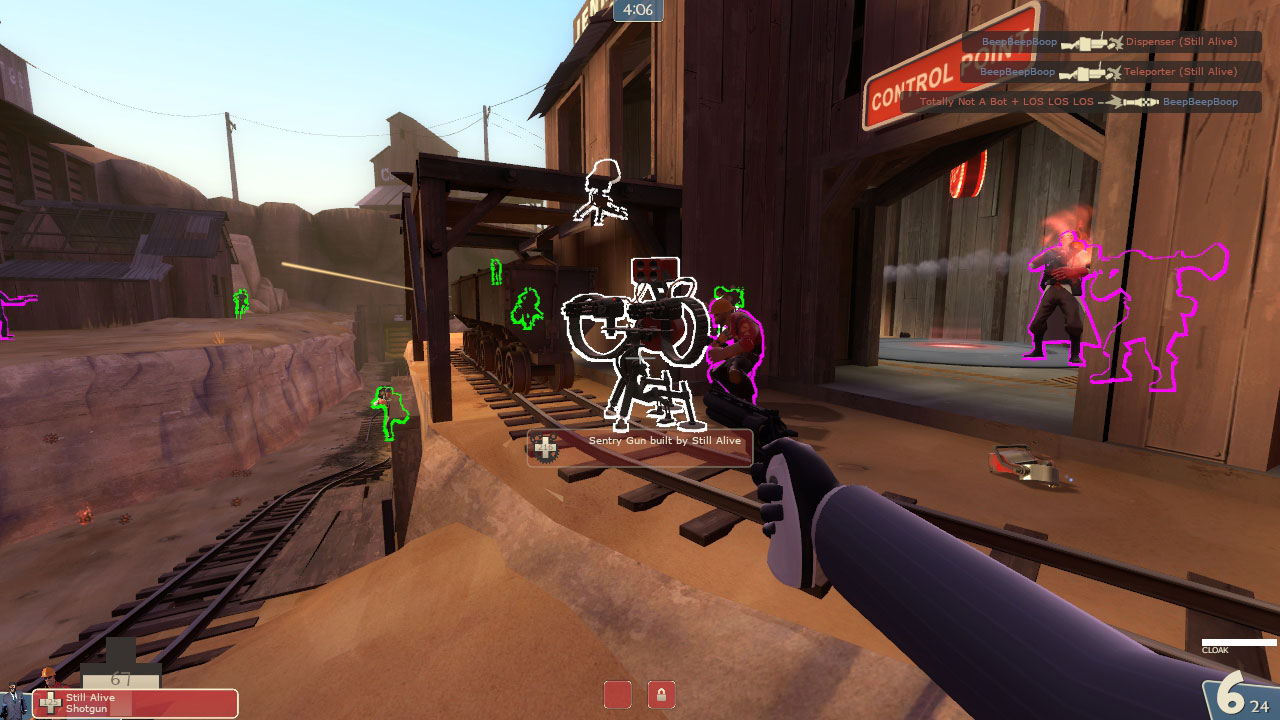
We’ll need somewhere to perform our modifications now. FrameStageNotify in IBaseClientDLL is always a safe bet. Our code will be executed during the FRAME_RENDER_START stage and will set the outline color for every registered entity to green.
for (int index = 0; index < glowobjectmanager->m_GlowObjectDefinitions.m_Size; index++) {
    GlowObjectDefinition_t& glowobject = glowobjectmanager->m_GlowObjectDefinitions[index];

    if (glowobject.m_nNextFreeSlot != ENTRY_IN_USE)
        continue;

    glowobject.m_vGlowColor = Vector(0.f, 1.f, 0.f);
}
We also have to set m_bGlowEnabled (currently 0xDA1) on the entity or they’ll only glow for the first 10 seconds after spawning. Be sure not to set this on the local player, dead players or on any dormant entities to avoid crashes.
If you just want to keep entities glowing then you only need to force m_bGlowEnabled to true. You won’t have any control over the color without the above code but players and buildings are already colored to match their respective teams.
for (int index = 1; index < entitylist->GetHighestEntityIndex(); index++) {
    C_BaseEntity* entity = static_cast<C_BaseEntity*>(entitylist->GetClientEntity(index));

    if (!entity || index == engine->GetLocalPlayer() || entity->IsDormant())
        continue;

    switch (entity->GetClientClass()->m_nClassID) {
        case CTFPlayer:
        case CObjectSentrygun:
        case CObjectTeleporter:
        case CObjectDispenser:
            entity->SetGlowEnabled(!entity->IsDormant() && entity->GetLifeState() == LIFE_ALIVE);
            break;
    }
}
Now that everything is working as intended, you can drop the offset and create a nice signature to survive future updates.
glowobjectmanager = *reinterpret_cast<CGlowObjectManager**>(FindPattern("bin/client.so", "C1 E0 05 03 05") + 5);
That’s all for Team Fortress 2, time to switch to Counter-Strike: Global Offensive now. Open client_client.so and, once again, search for the “EntityGlowEffects” string and follow the reference to CGlowObjectManager::RenderGlowEffects.
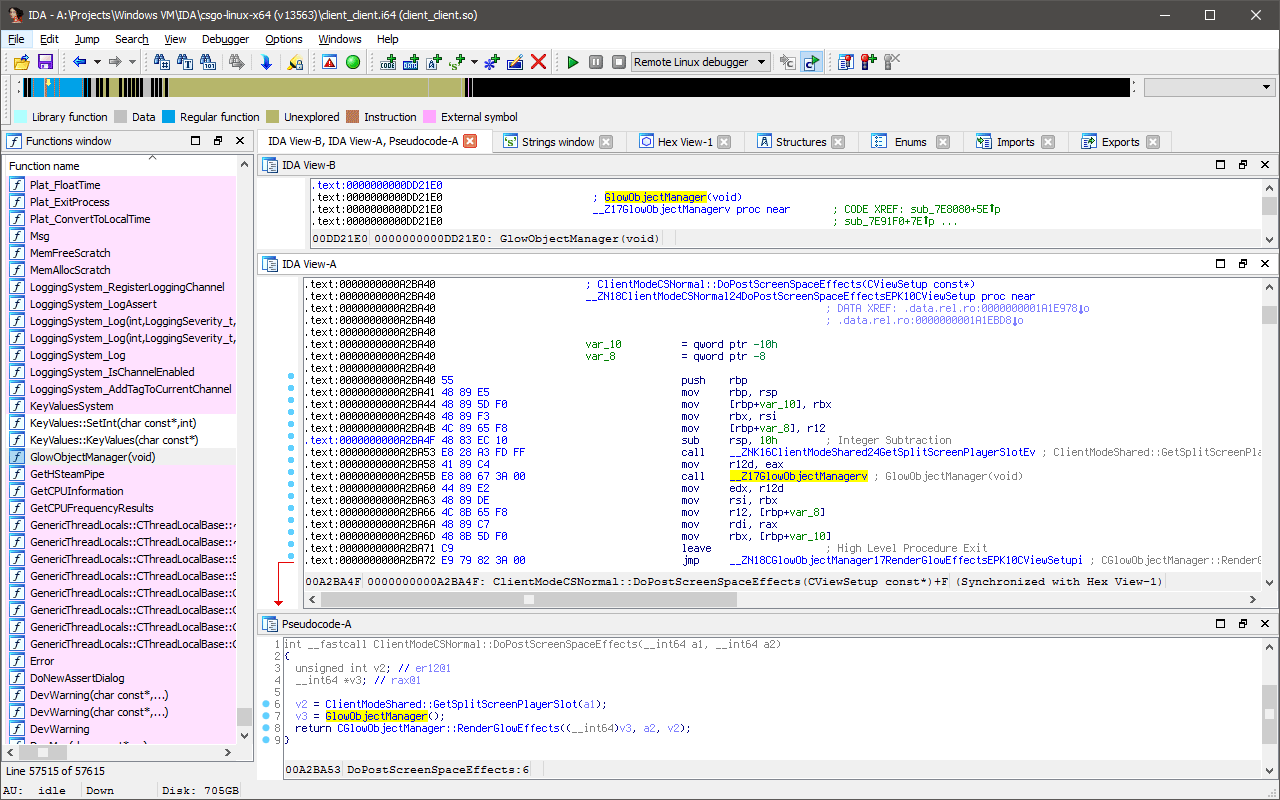
As expected, RenderGlowEffects is called from DoPostScreenSpaceEffects but it’s a little different this time. The pointer we’re looking for is returned from the GlowObjectManager function so we can either call the function or look a little further and find the underlying return address. It’s entirely up to you since both achieve the same effect.
typedef CGlowObjectManager* (*GlowObjectManager_t) ();
glowobjectmanager = reinterpret_cast<GlowObjectManager_t>(client_client_so_addr + 0xDD21E0)();
Now before you try and use the same code from the Team Fortress 2 example it’s worth knowing the GlowObjectDefinition_t structure has changed since then. I have no idea what some of these new variables are for so we can just add padding bytes and let the engine deal with it. Just don’t change any of them and you’ll be fine.
struct GlowObjectDefinition_t {
    C_BaseEntity* m_pEntity;
    Vector m_vGlowColor;
    float m_flGlowAlpha;
    char __unknown00[8];
    float m_flBloomAmount;
    char __unknown01[4];
    bool m_bRenderWhenOccluded;
    bool m_bRenderWhenUnoccluded;
    bool m_bFullBloomRender;
    char __unknown02;
    int m_nFullBloomStencilTestValue;
    char __unknown03[4];
    int m_nSplitScreenSlot;
    int m_nNextFreeSlot;
};
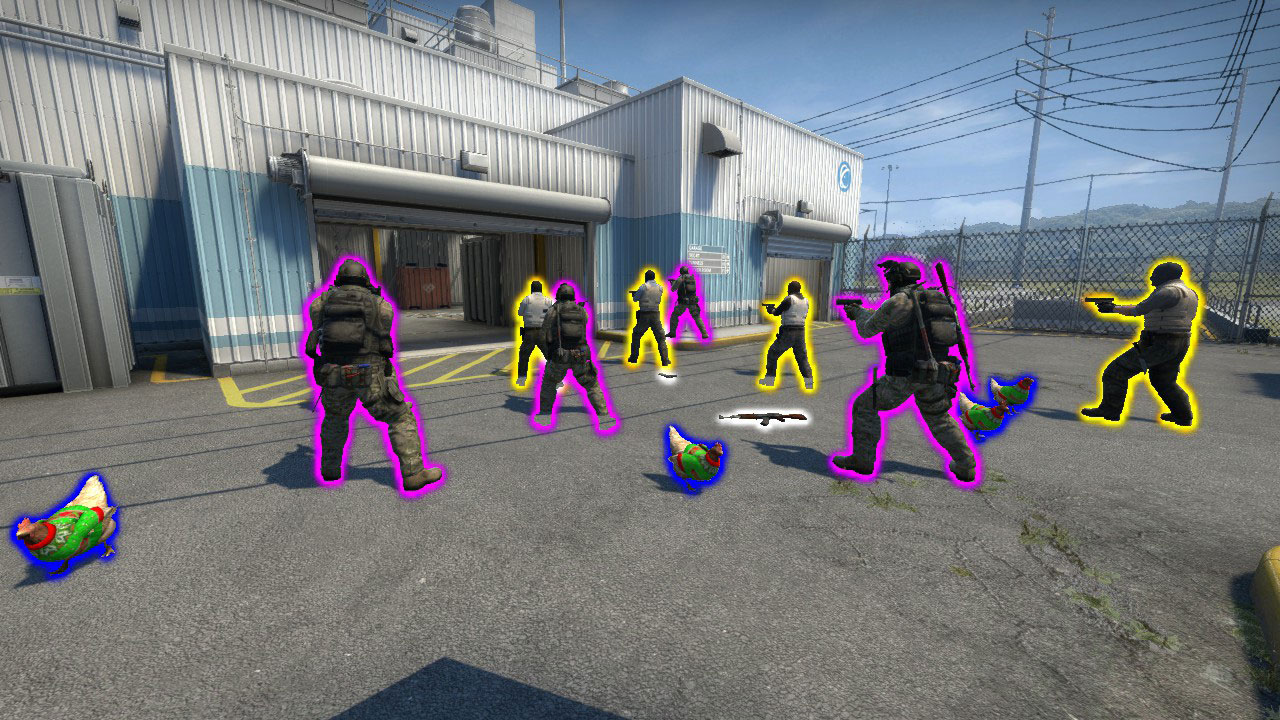
This time we only need to iterate the already registered glow objects. You can add your own glow object definitions to the list as long as there are free slots. Remember to drop them from the list when the entity is removed or the game will crash.
In this game, the glow object gives you a direct pointer to the entity instead of a handle which makes things even easier. You only need to set m_bShouldGlow (currently 0x3048) on entities deriving from CDynamicProp - most useful for chickens.
for (int index = 0; index < glowobjectmanager->m_GlowObjectDefinitions.m_Size; index++) {
    GlowObjectDefinition_t& glowobject = glowobjectmanager->m_GlowObjectDefinitions[index];

    if (glowobject.m_nNextFreeSlot != ENTRY_IN_USE)
        continue;

    C_BaseEntity* entity = glowobject.m_pEntity;

    if (entity->GetClientClass()->m_nClassID == CChicken)
        entity->SetShouldGlow(true);

    glowobject.m_vGlowColor = Vector(1.0f, 1.0f, 1.0f);
    glowobject.m_flGlowAlpha = 1.0f;
    glowobject.m_bRenderWhenOccluded = true;
    glowobject.m_flBloomAmount = 1.0f;
}
If you’ve been relying on public signatures, offsets or code hopefully this has demystified some things for you and now you’re able to do it all by yourself. I won’t be publishing this in a ‘ready to compile’ state this time since I feel there should be a suitable barrier to entry for code that could potentially give a competitive advantage. Until next time, thanks for reading!